I-made-Ina-Gartens-shepherds-pie-The-cozy-affordable-recipe.jpeg

I made Ina Garten’s shepherd’s pie. The cozy, affordable recipe is perfect for St. Patrick’s Day.

Updated

  • I tried Ina Garten’s easy shepherd’s pie recipe.
  • The meal took less than an hour to prepare.
  • The pie’s filling was flavorful and savory, while the mashed potatoes were perfectly creamy.

I’m an Irish-American, but I didn’t grow up eating shepherd’s pie.

This traditional Irish dish has its origins in the late 1700s, when rural women made it using ingredients from their Sunday roast dinners to repurpose leftovers, Britannica reported.

However, shepherd’s pie has become a favorite in the US, as well. While Irish versions typically use lamb, many American versions of the recipe use ground beef or turkey instead, and celebrity chefs like Ina Garten have published their own unique spins on the dish, perfect for weeknight meals. 

Garten is one of the most beloved celebrity chefs — with a reported net worth in the millions, 13 cookbooks under her belt, and a devoted fan following — so her shepherd’s pie seemed a good place for me to start.

Her recipe, reposted by the recipe blog Half-Scratched, calls for ingredients such as carrots, celery, white button mushrooms, ground turkey, and homemade mashed potatoes.

Here’s how to make Ina Garten’s shepherd’s pie.

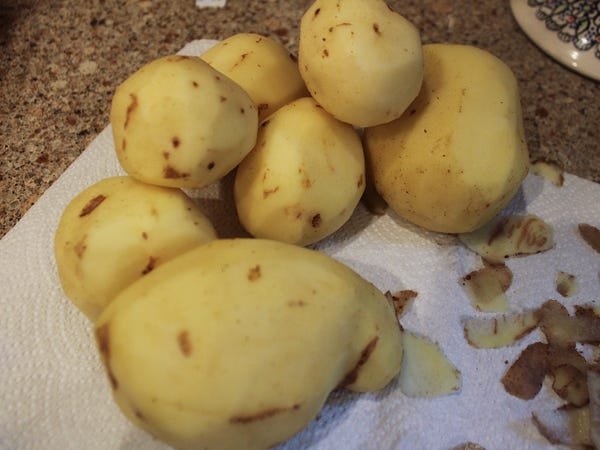
I started by peeling my Yukon gold potatoes.

Peeled potatoes.

Erin McDowell/Business Insider

A bag of potatoes typically weighs around 5 pounds, but the recipe only called for 3 pounds of potatoes. In the end, I found that this was the perfect amount to fully cover the pie.

I then chopped the potatoes into 1-inch cubes and placed them in a pot with water.


peeled and chopped russet potatoes

Peeled and chopped potatoes.

Erin McDowell/Business Insider

I simmered the potatoes until they were tender. This took about 20 minutes.

I used a time-saving hack to prepare my vegetables.


chopped vegetables in a small bowl

Chopped vegetables.

Erin McDowell/Business Insider

The recipe called for finely diced carrots, celery, and white button mushrooms. I decided to use a food processor to easily chop my vegetables. I liked the end result and found this was the simplest way to prepare all the vegetables in seconds.

I also hand-chopped some mushrooms to add more texture.


chopped vegetables in a small bowl

Mushrooms.

Erin McDowell/Business Insider

After my vegetables were chopped, I set them aside in a small bowl and turned my attention toward cooking the meat.

The recipe calls for 1 1/2 pounds of ground turkey meat, but you can get creative if you don’t want to use turkey.


cooked ground turkey meat in a large saute pan

Cooked ground turkey meat.

Erin McDowell/Business Insider

You can use practically any kind of ground meat you would like, or even plant-based ground meat if you’re vegetarian. I ended up liking the choice of ground turkey since it made the very stick-to-your-bones meal a little bit lighter than if I had used meat with higher fat content.

I ended up using a package and a half of ground turkey.

While the turkey cooked, I crumbled it with a wooden spoon. Once the meat was fully cooked, I removed it from the pan with a slotted metal spoon and left the fat in the pan.

The recipe also called for diced onion.


diced onion in a food processor

Diced onion.

Erin McDowell/Business Insider

I chopped it using the food processor again and added it to the pan.

I started to sauté the onion, and it filled my kitchen with a delicious aroma. There should be enough fat in the pan from the turkey to sauté the onion, but you can also add olive oil or butter if you don’t have enough liquid.

I then added the other vegetables and cooked them down until they were combined and soft.


shepherds pie filling in a large saute pan

Shepherd’s pie filling.

Erin McDowell/Business Insider

I also added flour to the pan, creating a paste-like mixture. 

I then added chicken broth and cooked the mixture until it was fully combined and some of the liquid had evaporated.


shepherds pie filling in a large saute pan

Shepherd’s pie filling.

Erin McDowell/Business Insider

I also added tomato paste, Worcestershire sauce, bay leaf, rosemary, thyme, and frozen peas to the pan and continued cooking the filling until it reached a simmer.

After stirring in the turkey, the mixture was really starting to resemble the filling of shepherd’s pie.


shepherds pie filling in a large saute pan

Shepherd’s pie filling.

Erin McDowell/Business Insider

I removed the bay leaves and herb sprigs before seasoning the mixture to taste and setting it aside.

After I finished the pie filling, I started getting my potatoes ready for baking.


hand mashing potatoes in a black pot

Hand-mashing potatoes.

Erin McDowell/Business Insider

After draining the potatoes, I hand-mashed them in the same pot I cooked them in. The recipe called for a hand mixer, but I found a potato masher just as effective at making creamy mashed potatoes, especially after adding in a mixture of whole milk, almost a stick of Kerry Gold butter, and sour cream.

The potatoes turned out perfectly creamy.


mashed potatoes and a wooden spoon

Mashed potatoes.

Erin McDowell/Business Insider

I seasoned them to taste and set them aside. I then preheated my oven to 400 degrees Fahrenheit. 

I added the pie filling to a large casserole dish and used a spoon to create an even layer of the meat and vegetables.


ina garten shepherd's pie without mashed potatoes

Shepherd’s pie without the mashed potatoes.

Erin McDowell/Business Insider

There was a perfect amount of filling to create a thick layer.

I spread the creamy mashed potatoes over the filling, making sure to reach the edges of the pan.


ina garten shepherd's pie

Ina Garten’s shepherd’s pie.

Erin McDowell/Business Insider

Despite never having made this dish before, I found the process easy to follow and not overwhelming at all. I also had a spoonful of mashed potatoes left over to taste and thought they were delicious.

I wanted to have a deep-golden crust on the mashed potatoes, so I let the pie cook a bit longer than the recipe suggested.


ina garten shepherd's pie

Ina Garten’s shepherd’s pie.

Erin McDowell/Business Insider

I cooked the pie in the oven for about half an hour, although the recipe suggested it would be done after 20 minutes. All in all, the recipe took me less than an hour in total to prepare. 

All ovens can vary slightly in cook time, so I suggest checking the dish until you’re happy with the result.

When I served the pie, it was piping hot and delicious. I would definitely make this recipe again for St. Patrick’s Day.


ina garten shepherd's pie on a plate

Ina Garten’s shepherd’s pie.

Erin McDowell/Business Insider

It didn’t quite hold its shape, but I imagine it would have if I had let the pie sit for a minute or two before I served it. However, I simply couldn’t resist diving in. 

The mashed potatoes were creamy, the filling was perfectly seasoned, and the vegetables all came through in a medley of flavors. It was simple enough to be convenient for a weeknight meal, yet impressive enough for a dinner party.

The recipe also made enough to feed six people and in my experience, with plenty of leftovers, so it also seemed a cost-effective option to feed a family or to prep meals for the week.

In my book, this cozy recipe got a thumbs up.


Source link

This-is-the-only-mac-and-cheese-recipe-you-need.jpeg

This is the only mac and cheese recipe you need for Super Bowl weekend

  • I made the famous mac and cheese recipe by “Next Level Chef” star Tineke “Tini” Younger. 
  • Her mac and cheese has racked up over 100 million views on TikTok. 
  • I loved her twists on the recipe and think this dish is perfect for Super Bowl Sunday. 

It’s not easy for a recipe to take hold on TikTok these days. So rarely does another dalgona coffee or feta pasta come our way.

That changed when “Next Level Chef” star Tineke “Tini” Younger shared her mac and cheese recipe.

Younger originally posted the video for Thanksgiving in November 2023, and the recipe — which seems to rack up more than 100 million views every time it’s shared — became an instant hit.

Tini’s recipe is now a holiday favorite, but I always crave mac and cheese on Super Bowl Sunday.

Here’s how to make it.

Tineke “Tini” Younger’s mac and cheese recipe features twists on the traditional ingredients.

This mac and cheese features sharp cheddar, mozzarella, and colby jack.

Anneta Konstantinides/Business Insider

To make Tini’s mac and cheese at home, you’ll need:

  • 1 pound of cavatappi pasta
  • 16 ounces of mozzarella cheese, grated
  • 16 ounces of colby jack cheese, grated
  • 8 ounces of sharp cheddar cheese, grated
  • 1 12-ounce can of evaporated milk
  • 2 cups of heavy cream
  • 3 tablespoons of butter
  • 3 tablespoons of flour
  • 1 tablespoon of Dijon mustard
  • 1 teaspoon of garlic powder
  • 1 teaspoon of smoked paprika
  • ½ teaspoon of salt
  • ½ teaspoon of pepper

First, I cooked my pasta.


Cooking pasta for Tini's mac and cheese

I used cavatappi noodles, per Tini’s recommendation, for my mac and cheese.

Anneta Konstantinides/Business Insider

In her TikTok video, Younger said she opts for cavatappi noodles because their shape holds the cheese sauce better than elbow pasta.

“All that cream gets all in the hole, so you bite into the cream and the cheesiness,” she said.

Once my pasta was al dente, I drained the pot and set it aside while I started the sauce.

Then I turned on my oven and began prepping the cheeses.


Grating cheese for Tini's mac and cheese

Grating all the cheeses was definitely a workout.

Anneta Konstantinides/Business Insider

I preheated the oven to 350 degrees Fahrenheit and greased my baking dish (Younger recommends using a 9-inch by 13-inch pan) before I started grating all the cheese.

The recipe includes 2 ½ pounds of cheese, and Younger is adamant that you shred it yourself.

“Do not use pre-shredded cheese at all,” she says in the TikTok.

Next, I tossed all the cheeses together.


Grated cheese for Tini's mac and cheese

My cheese mixture.

Anneta Konstantinides/Business Insider

After giving everything a good mix, I divided half of the cheese to use for the sauce.

I also prepped my seasoning mix.


Spice mix for Tini's mac and cheese

The seasoning mix includes garlic powder and smoked paprika, plus salt and pepper.

Anneta Konstantinides/Business Insider

I threw my garlic powder, smoked paprika, salt, and pepper into a small bowl so it’d be ready for the roux.

It was time to get cooking.


Melting butter for Tini's mac and cheese

I melted my butter for the roux.

Anneta Konstantinides/Business Insider

First, I melted my butter in a large pan over medium heat.

Once the butter had melted, I added half the seasoning mix.


Adding flour to butter for Tini's mac and cheese

Adding flour and seasoning to the roux.

Anneta Konstantinides/Business Insider

I started stirring as I added the flour. Younger said you should try to cook out all the flour, so I kept stirring for a few minutes.

I added the can of evaporated milk.


Adding condensed milk to roux for Tini's mac and cheese

I started whisking after adding the evaporated milk.

Anneta Konstantinides/Business Insider

Younger said you should start whisking right after adding the milk to avoid clumps in your roux. This is also when your sauce should begin to thicken.

I also added the heavy cream and the rest of my seasoning.


Adding heavy cream to roux for Tini's mac and cheese

Adding heavy cream to the sauce.

Anneta Konstantinides/Business Insider

I slowly began adding all my cheese.


Adding cheese to sauce for Tini's mac and cheese

Adding cheese to the sauce.

Anneta Konstantinides/Business Insider

Younger said you should let each handful of cheese melt before adding more.

Once all the cheese had melted, I threw in the pasta.


Adding pasta to cheese sauce for Tini's mac and cheese

Adding pasta to the cheese sauce.

Anneta Konstantinides/Business Insider

I made sure to give the pot a big mix so all the noodles were coated with the delicious-smelling cheese sauce.

Then I began building my mac and cheese pan.


First later of pasta for Tini's mac and cheese

My first layer of noodles.

Anneta Konstantinides/Business Insider

I added half of my cheesy cavatappi to the pan, spreading the noodles into an even layer.

I added half of my cheese mixture on top, then repeated the steps before throwing my pan into the oven.


Second layer of cheese for Tini's mac and cheese

I added a layer of cheese on top of the noodles, then repeated the steps for four total layers.

Anneta Konstantinides/Business Insider

I baked my mac and cheese for 25 minutes, until the cheese had melted and began to bubble. Then I threw the pan on broil for two minutes to help give the top a beautiful golden crust.

My mac and cheese got everyone talking at a potluck.


Tini's mac and cheese

Younger’s mac and cheese looked — and tasted — glorious.

Anneta Konstantinides/Business Insider

I made two pans of Younger’s mac and cheese (one with breadcrumbs and one without) for my friend’s NFL playoffs potluck, and it was one of the most popular dishes of the day.

The cavatappi noodles were the perfect vehicle for the thick and creamy cheese sauce, giving each bite an explosion of flavor. I far preferred them to the traditional elbow noodles, and I think Younger’s mac and cheese convinced everyone that cavatappi is the superior shape.

The cheese sauce was rich, indulgent, and delicious, and the Dijon mustard added a nice subtle tang. Our group was split 50/50 on whether the mac and cheese tasted better with breadcrumbs, so just stick to your personal preference.

If you’re looking for a Super Bowl side to steal the spotlight, Younger’s mac and cheese is the ultimate touchdown.


Source link

I-was-skeptical-but-Martha-Stewarts-crispy-tofu-recipe-is.jpeg

I was skeptical, but Martha Stewart’s crispy tofu recipe is my new favorite for a meatless, protein-packed lunch

  • I’ve been looking for a high-protein, meatless recipe that I could use for quick, easy lunches.
  • I decided to try Martha Stewart’s crispy fried tofu recipe, and it’s become my new go-to.
  • The tofu is flavorful enough on its own, but I love adding it to grain-and-veggie bowls.

Traumatizing: that’s the word I’d use to describe my first experience with tofu.

The first time I tried cooking tofu at home, it was completely flavorless, and worse yet, the texture reminded me of a soggy marshmallow.

It was almost enough to make me swear off tofu completely, but I’ve been on the hunt for high-protein, plant-based recipes, so I thought I’d bravely give it another go with Martha Stewart’s crispy fried tofu.

Stewart says that her recipe is not only a cinch to make, but also yields super-crunchy tofu. After trying it myself, I agree.

Not only was this tofu delicious, but it filled me up for several hours.

Extra-firm tofu in particular, which this recipe calls for, contains about 14 grams of protein per 3-ounce serving, although this can depend on the brand and product you buy.

Here’s how I make it.

You only need a few ingredients.

The ingredient list was short and sweet, and I already had several in my pantry.

Rebecca Strong

Conveniently, I already had most of the required ingredients for this recipe in my pantry and fridge.

Aside from extra-firm tofu, the recipe calls for a neutral cooking oil (like safflower), salt, and cornstarch.

Stewart also recommends grabbing mayonnaise and Sriracha for a dipping sauce, as well as chopped scallions and lime wedges for serving.

First, drain the tofu to ensure crispy results.


The writer draining tofu on a baking sheet.

In my experience, taking some time to drain the tofu is worth it.

Rebecca Strong

Although draining liquid out of tofu may take a little extra time, trust me when I say it’s worth it — because excess moisture will prevent your tofu from crisping up.

Stewart recommends lining a baking sheet with multiple layers of paper towels, arranging the sliced tofu on top, and then layering more paper towels on top of the tofu before weighing it down with another baking sheet topped with some heavy cans.

Then, wait 30 minutes for the liquid to drain onto the paper towels.

Stewart suggests slicing the tofu lengthwise into long strips, but I prefer to cut mine into cubes — I find that smaller pieces yield crispier edges.

Don’t forget to dredge the tofu.


The writer dredging the tofu in a bowl.

Next, I coated the tofu in cornstarch.

Rebecca Strong

After draining the tofu, coating it in cornstarch is key: When I first tried a fried-tofu recipe, I didn’t follow this step, and it didn’t crisp up nearly as well.

Stewart suggests mixing any of your preferred spices into the cornstarch prior to dredging, so I added garlic powder, sea salt, and sesame seeds. Other options mentioned in the recipe include Cajun seasoning, onion powder, and ground cumin.

To coat it, pour the cornstarch and spices into a large bowl or container, then add the tofu. Once everything’s in the bowl, either toss it with your hands or pop on a lid and shake it all up until all the sides are coated.

Next, it’s time to fry.


The writer frying the crispy tofu on a stovetop.

I used organic canola oil to fry my tofu.

Rebecca Strong

Heat up your oil in a large, heavy-bottomed pan over medium.

Stewart’s favorite oil for this recipe is safflower, since it has a high smoke point and neutral flavor — but canola oil, sunflower oil, vegetable oil, and peanut oil also work. I used organic canola oil because it’s what I had on hand.

If the tofu is too crowded in the pan, it won’t get evenly crunchy on the outside — so, Stewart says it’s best to split the tofu into two batches.

Fry each batch until the exterior of the tofu has just turned golden brown, turning every minute or two to ensure all sides make contact with the oil.

This should take five minutes, according to Stewart, but it took me closer to seven — perhaps because I like mine extra crunchy.

Finally, transfer your tofu to a paper-towel-lined plate and season it.


The finished crispy tofu on a paper towel.

The tofu came out looking crunchy and delicious.

Rebecca Strong

Once the tofu is done cooking, transfer it to a plate lined with paper towels to soak up any excess oil.

This is when Stewart recommends seasoning the tofu with salt, but because I already added salt to the cornstarch coating, I skipped that step.

Stewart’s favorite dipping sauce for this tofu is a mixture of mayo and Sriracha. I’m not a huge mayo fan, so I used a spicy tahini for a similar but nuttier vibe.

I did, however, follow her tips to garnish with scallions for a pleasantly peppery bite.

Now, I love adding this tofu to grain-and-veggie bowls for easy, high-protein lunches.


The tofu in a bowl with scallions, Brussels sprouts, cauliflower, and rice.

This tofu is great on its own, or as the starring ingredient in a veggie bowl.

Rebecca Strong

Miraculously, this recipe completely transformed my feelings about tofu.

I was amazed by the satisfying, crunchy texture and the sheer amount of flavor it held when seasoned well and served with the right sauce.

Best of all, this tofu is super versatile. Since falling in love with this recipe, I’ve started adding it to grain bowls with veggies for a super-satiating lunch or dinner.

My favorite combo is quinoa or white rice with roasted or sauteed Brussels sprouts, cauliflower, and broccoli. Sometimes I’ll toss in some avocado for creamy texture and healthy fats, or take a cue from Stewart and add a squeeze of lime.

I also believe this tofu would be a tasty addition to a Caesar salad, lettuce wrap, or taco with black beans and avocado.


Source link