I-compared-Martha-Stewarts-and-Ina-Gartens-BLT-sandwiches-and.jpeg

I compared Martha Stewart’s and Ina Garten’s BLT sandwiches, and I preferred the recipe with store-bought mayo

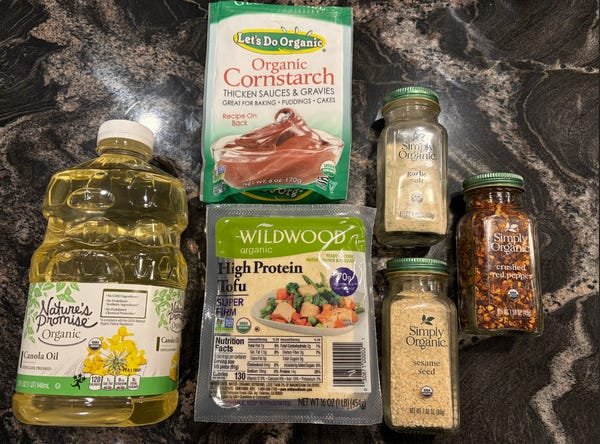
For Stewart’s homemade mayo recipe, you’ll need one large egg yolk, one teaspoon of Dijon mustard, one teaspoon of fresh lemon juice, coarse salt, white pepper — I substituted it with black pepper, as that’s what I had — and a cup of lightly flavored oil.

Stewart’s recipe called for grapeseed, sunflower, or safflower oil, but I used vegetable oil — which is also mild in flavor — because I already had it in my kitchen.

The first step in making homemade mayo is mixing the egg yolk, Dijon mustard, salt, pepper, and lemon juice.


Source link

This-is-the-only-mac-and-cheese-recipe-you-need.jpeg

This is the only mac and cheese recipe you need for Super Bowl weekend

  • I made the famous mac and cheese recipe by “Next Level Chef” star Tineke “Tini” Younger. 
  • Her mac and cheese has racked up over 100 million views on TikTok. 
  • I loved her twists on the recipe and think this dish is perfect for Super Bowl Sunday. 

It’s not easy for a recipe to take hold on TikTok these days. So rarely does another dalgona coffee or feta pasta come our way.

That changed when “Next Level Chef” star Tineke “Tini” Younger shared her mac and cheese recipe.

Younger originally posted the video for Thanksgiving in November 2023, and the recipe — which seems to rack up more than 100 million views every time it’s shared — became an instant hit.

Tini’s recipe is now a holiday favorite, but I always crave mac and cheese on Super Bowl Sunday.

Here’s how to make it.

Tineke “Tini” Younger’s mac and cheese recipe features twists on the traditional ingredients.

This mac and cheese features sharp cheddar, mozzarella, and colby jack.

Anneta Konstantinides/Business Insider

To make Tini’s mac and cheese at home, you’ll need:

  • 1 pound of cavatappi pasta
  • 16 ounces of mozzarella cheese, grated
  • 16 ounces of colby jack cheese, grated
  • 8 ounces of sharp cheddar cheese, grated
  • 1 12-ounce can of evaporated milk
  • 2 cups of heavy cream
  • 3 tablespoons of butter
  • 3 tablespoons of flour
  • 1 tablespoon of Dijon mustard
  • 1 teaspoon of garlic powder
  • 1 teaspoon of smoked paprika
  • ½ teaspoon of salt
  • ½ teaspoon of pepper

First, I cooked my pasta.


Cooking pasta for Tini's mac and cheese

I used cavatappi noodles, per Tini’s recommendation, for my mac and cheese.

Anneta Konstantinides/Business Insider

In her TikTok video, Younger said she opts for cavatappi noodles because their shape holds the cheese sauce better than elbow pasta.

“All that cream gets all in the hole, so you bite into the cream and the cheesiness,” she said.

Once my pasta was al dente, I drained the pot and set it aside while I started the sauce.

Then I turned on my oven and began prepping the cheeses.


Grating cheese for Tini's mac and cheese

Grating all the cheeses was definitely a workout.

Anneta Konstantinides/Business Insider

I preheated the oven to 350 degrees Fahrenheit and greased my baking dish (Younger recommends using a 9-inch by 13-inch pan) before I started grating all the cheese.

The recipe includes 2 ½ pounds of cheese, and Younger is adamant that you shred it yourself.

“Do not use pre-shredded cheese at all,” she says in the TikTok.

Next, I tossed all the cheeses together.


Grated cheese for Tini's mac and cheese

My cheese mixture.

Anneta Konstantinides/Business Insider

After giving everything a good mix, I divided half of the cheese to use for the sauce.

I also prepped my seasoning mix.


Spice mix for Tini's mac and cheese

The seasoning mix includes garlic powder and smoked paprika, plus salt and pepper.

Anneta Konstantinides/Business Insider

I threw my garlic powder, smoked paprika, salt, and pepper into a small bowl so it’d be ready for the roux.

It was time to get cooking.


Melting butter for Tini's mac and cheese

I melted my butter for the roux.

Anneta Konstantinides/Business Insider

First, I melted my butter in a large pan over medium heat.

Once the butter had melted, I added half the seasoning mix.


Adding flour to butter for Tini's mac and cheese

Adding flour and seasoning to the roux.

Anneta Konstantinides/Business Insider

I started stirring as I added the flour. Younger said you should try to cook out all the flour, so I kept stirring for a few minutes.

I added the can of evaporated milk.


Adding condensed milk to roux for Tini's mac and cheese

I started whisking after adding the evaporated milk.

Anneta Konstantinides/Business Insider

Younger said you should start whisking right after adding the milk to avoid clumps in your roux. This is also when your sauce should begin to thicken.

I also added the heavy cream and the rest of my seasoning.


Adding heavy cream to roux for Tini's mac and cheese

Adding heavy cream to the sauce.

Anneta Konstantinides/Business Insider

I slowly began adding all my cheese.


Adding cheese to sauce for Tini's mac and cheese

Adding cheese to the sauce.

Anneta Konstantinides/Business Insider

Younger said you should let each handful of cheese melt before adding more.

Once all the cheese had melted, I threw in the pasta.


Adding pasta to cheese sauce for Tini's mac and cheese

Adding pasta to the cheese sauce.

Anneta Konstantinides/Business Insider

I made sure to give the pot a big mix so all the noodles were coated with the delicious-smelling cheese sauce.

Then I began building my mac and cheese pan.


First later of pasta for Tini's mac and cheese

My first layer of noodles.

Anneta Konstantinides/Business Insider

I added half of my cheesy cavatappi to the pan, spreading the noodles into an even layer.

I added half of my cheese mixture on top, then repeated the steps before throwing my pan into the oven.


Second layer of cheese for Tini's mac and cheese

I added a layer of cheese on top of the noodles, then repeated the steps for four total layers.

Anneta Konstantinides/Business Insider

I baked my mac and cheese for 25 minutes, until the cheese had melted and began to bubble. Then I threw the pan on broil for two minutes to help give the top a beautiful golden crust.

My mac and cheese got everyone talking at a potluck.


Tini's mac and cheese

Younger’s mac and cheese looked — and tasted — glorious.

Anneta Konstantinides/Business Insider

I made two pans of Younger’s mac and cheese (one with breadcrumbs and one without) for my friend’s NFL playoffs potluck, and it was one of the most popular dishes of the day.

The cavatappi noodles were the perfect vehicle for the thick and creamy cheese sauce, giving each bite an explosion of flavor. I far preferred them to the traditional elbow noodles, and I think Younger’s mac and cheese convinced everyone that cavatappi is the superior shape.

The cheese sauce was rich, indulgent, and delicious, and the Dijon mustard added a nice subtle tang. Our group was split 50/50 on whether the mac and cheese tasted better with breadcrumbs, so just stick to your personal preference.

If you’re looking for a Super Bowl side to steal the spotlight, Younger’s mac and cheese is the ultimate touchdown.


Source link

I-was-skeptical-but-Martha-Stewarts-crispy-tofu-recipe-is.jpeg

I was skeptical, but Martha Stewart’s crispy tofu recipe is my new favorite for a meatless, protein-packed lunch

  • I’ve been looking for a high-protein, meatless recipe that I could use for quick, easy lunches.
  • I decided to try Martha Stewart’s crispy fried tofu recipe, and it’s become my new go-to.
  • The tofu is flavorful enough on its own, but I love adding it to grain-and-veggie bowls.

Traumatizing: that’s the word I’d use to describe my first experience with tofu.

The first time I tried cooking tofu at home, it was completely flavorless, and worse yet, the texture reminded me of a soggy marshmallow.

It was almost enough to make me swear off tofu completely, but I’ve been on the hunt for high-protein, plant-based recipes, so I thought I’d bravely give it another go with Martha Stewart’s crispy fried tofu.

Stewart says that her recipe is not only a cinch to make, but also yields super-crunchy tofu. After trying it myself, I agree.

Not only was this tofu delicious, but it filled me up for several hours.

Extra-firm tofu in particular, which this recipe calls for, contains about 14 grams of protein per 3-ounce serving, although this can depend on the brand and product you buy.

Here’s how I make it.

You only need a few ingredients.

The ingredient list was short and sweet, and I already had several in my pantry.

Rebecca Strong

Conveniently, I already had most of the required ingredients for this recipe in my pantry and fridge.

Aside from extra-firm tofu, the recipe calls for a neutral cooking oil (like safflower), salt, and cornstarch.

Stewart also recommends grabbing mayonnaise and Sriracha for a dipping sauce, as well as chopped scallions and lime wedges for serving.

First, drain the tofu to ensure crispy results.


The writer draining tofu on a baking sheet.

In my experience, taking some time to drain the tofu is worth it.

Rebecca Strong

Although draining liquid out of tofu may take a little extra time, trust me when I say it’s worth it — because excess moisture will prevent your tofu from crisping up.

Stewart recommends lining a baking sheet with multiple layers of paper towels, arranging the sliced tofu on top, and then layering more paper towels on top of the tofu before weighing it down with another baking sheet topped with some heavy cans.

Then, wait 30 minutes for the liquid to drain onto the paper towels.

Stewart suggests slicing the tofu lengthwise into long strips, but I prefer to cut mine into cubes — I find that smaller pieces yield crispier edges.

Don’t forget to dredge the tofu.


The writer dredging the tofu in a bowl.

Next, I coated the tofu in cornstarch.

Rebecca Strong

After draining the tofu, coating it in cornstarch is key: When I first tried a fried-tofu recipe, I didn’t follow this step, and it didn’t crisp up nearly as well.

Stewart suggests mixing any of your preferred spices into the cornstarch prior to dredging, so I added garlic powder, sea salt, and sesame seeds. Other options mentioned in the recipe include Cajun seasoning, onion powder, and ground cumin.

To coat it, pour the cornstarch and spices into a large bowl or container, then add the tofu. Once everything’s in the bowl, either toss it with your hands or pop on a lid and shake it all up until all the sides are coated.

Next, it’s time to fry.


The writer frying the crispy tofu on a stovetop.

I used organic canola oil to fry my tofu.

Rebecca Strong

Heat up your oil in a large, heavy-bottomed pan over medium.

Stewart’s favorite oil for this recipe is safflower, since it has a high smoke point and neutral flavor — but canola oil, sunflower oil, vegetable oil, and peanut oil also work. I used organic canola oil because it’s what I had on hand.

If the tofu is too crowded in the pan, it won’t get evenly crunchy on the outside — so, Stewart says it’s best to split the tofu into two batches.

Fry each batch until the exterior of the tofu has just turned golden brown, turning every minute or two to ensure all sides make contact with the oil.

This should take five minutes, according to Stewart, but it took me closer to seven — perhaps because I like mine extra crunchy.

Finally, transfer your tofu to a paper-towel-lined plate and season it.


The finished crispy tofu on a paper towel.

The tofu came out looking crunchy and delicious.

Rebecca Strong

Once the tofu is done cooking, transfer it to a plate lined with paper towels to soak up any excess oil.

This is when Stewart recommends seasoning the tofu with salt, but because I already added salt to the cornstarch coating, I skipped that step.

Stewart’s favorite dipping sauce for this tofu is a mixture of mayo and Sriracha. I’m not a huge mayo fan, so I used a spicy tahini for a similar but nuttier vibe.

I did, however, follow her tips to garnish with scallions for a pleasantly peppery bite.

Now, I love adding this tofu to grain-and-veggie bowls for easy, high-protein lunches.


The tofu in a bowl with scallions, Brussels sprouts, cauliflower, and rice.

This tofu is great on its own, or as the starring ingredient in a veggie bowl.

Rebecca Strong

Miraculously, this recipe completely transformed my feelings about tofu.

I was amazed by the satisfying, crunchy texture and the sheer amount of flavor it held when seasoned well and served with the right sauce.

Best of all, this tofu is super versatile. Since falling in love with this recipe, I’ve started adding it to grain bowls with veggies for a super-satiating lunch or dinner.

My favorite combo is quinoa or white rice with roasted or sauteed Brussels sprouts, cauliflower, and broccoli. Sometimes I’ll toss in some avocado for creamy texture and healthy fats, or take a cue from Stewart and add a squeeze of lime.

I also believe this tofu would be a tasty addition to a Caesar salad, lettuce wrap, or taco with black beans and avocado.


Source link